Install the coherence Unity SDK
Step-by-Step guide
Follow these 5 very easy steps to install coherence into a new or existing Unity project.
Alternatively, you can check out the video tutorial.
1. Open Project Settings
Inside of Unity, you can find this under Edit > Project Settings.
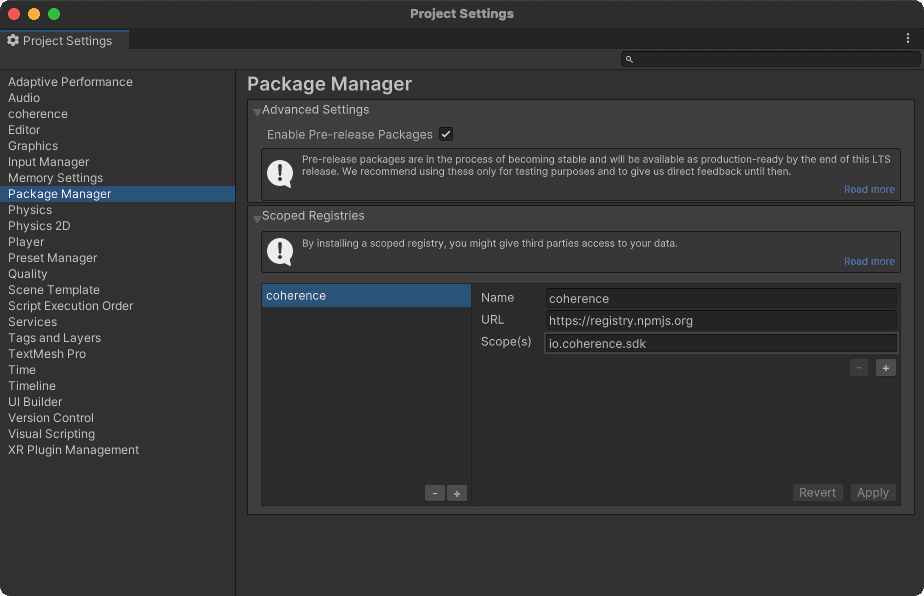
2. Add A Scoped Registry
Within Package Manager in the Project Settings panel, add a new Scoped Registry with the following configuration:
- Name: coherence
- URL: https://registry.npmjs.org
- Scope(s): io.coherence.sdk
- Enable Preview/Pre-release Packages: Yes
3. Open Package Manager
You can access the Package Manager via the Window drop-down menu.
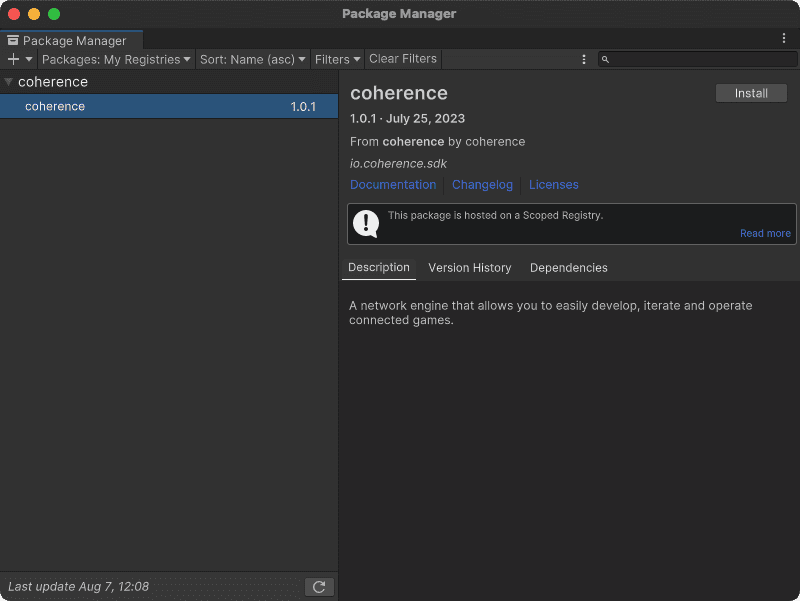
4. Choose My Registries
Select the Packages: Unity Registry dropdown and choose My Registries. Note: if you don’t see this option, double check steps 1 & 2 first!
5. Install package
Under coherence, you’ll see the current version and an install button. Click this to install the latest version of coherence and get started.
Next steps
When the coherence SDK installation has been successful, the Welcome Window will be shown on starting Unity.
Tip: Make sure you allow HTTP connections in Editor, otherwise you may encounter Insecure connection not allowed errors. Please see this article for more information.